How to choose the best Make-up artist for your wedding.

How to book the best Make-up artist.

Being a Pro Make-up artist with over 27 years of experience, including working on London Fashion week, magazines, T.V and theatre, (14 of these working exclusively with Brides/weddings and private make-up lessons), I regularly hear horror stories of how people have bad experiences having their make-up applied, this often gives seasoned Make-up artists bad press and a hard time gaining trust with potential clients.  I also often hear of how people are uncertain about the kind of things they should be looking for when booking a Make-up artist.

Sometimes people go for the cheaper option when booking a Make-up artist and in turn, they mostly end up paying more money in the long-run as they soon find out they are not going to deliver what they expect on their make-up trial.  Thus, they then have to pay out for a higher end Make-up artist so have ended up wasting time and money, often the higher end Make-up artist is not available, so more stress!

The right Make-up artist will be spending several hours with you and the rest of your wedding party, therefore, its essential you actually like being around them and have a good rapport.  Trust and confidence is key here.  Its so important to be able to talk to them and be yourself.  A good Make-up artist should have this skill naturally. Giving moral support and being a calming influence is very important as nerves are always present, especially on a wedding morning.

Not only should a good Make-up artist apply beautiful make-up but she needs to be professional, work hygienically, be a great time keeper, be calm and like working under pressure, this in turn will help you on what will be one of the most important days of your life, so you need to choose very wisely.

Here are a few tips to help you choose and avoid making expensive mistakes when choosing a Make-up artist -

Look at the Make-up artists social media/website/blog and read their reviews - this is a very important indication of the artists' level of professionalism and dedication to her career.  First impressions count.

Make sure you get at least 3 good reviews for the Make-up artist you have in mind.

What experience have they got? How many weddings/Brides have they worked on?

Do you like their make-up style?

Do they have a contract? - A Pro will have a contract in place, (mine is devised by my solicitor and updated every year.)  Be wary of any artist who does not provide a contract or does not require a deposit.

Make sure they provide you with receipts of any money paid and keep all correspondence.

Are they quick with correspondence? A good artist will not keep you waiting for days to answer your e-mail/phone call.

Does the artist have a back up plan in place on their contract? if for any reason she cannot honour your booking on the wedding day?

Does the artist appear calm and professional? (even if this is via e-mail/telephone.)

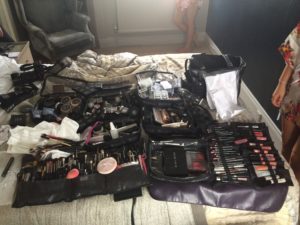
If you meet them for the trial - does their kit/brushes look well stocked and hygienically clean and sanitised?  Are they hygienic in how they work? (I lose count of the amount of times I see "artists" using the same wand out of mascara! and using that on lots of different people....ewwwww!  Do they clean their hands before touching your face? Ask them how they clean and sanitise their brushes/kit and how often.  Are they presentable in their appearance?  Do they work in a clean and tidy workspace on the trial, (if they work from a studio.)

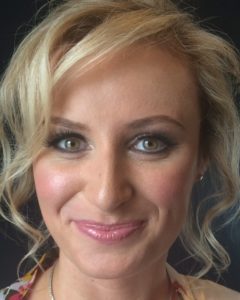
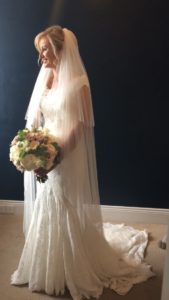
Study the artists portfolio - this will give you an indication of their style and versatility.  Can she follow your brief and the rest of your wedding parties?

Where did they study make-up? and for how long? how long have they been a Make-up artist?

What are their rates? This is indicative of their experience and service. Make-up artistry is a luxury service, and the price should be a reflection of that too.

How long does it take them to apply each persons make-up? (On the wedding day it takes me about half an hour per person, with the Brides about an hour. Trials about an hour each.  I can apply make-up for up to 10 ladies make-ups in one package.)

Do they have knowledge/experience in Beauty therapy? as this will ensure they have the relevant knowledge about any skin conditions that may arise, so they can be dealt with in the correct manner.  Do they have knowledge about sensitive skin or acne for example? or how to camouflage a black eye? (I have had to do this on numerous occasions!..a long story!)

What brand/s do they use? Choose an artist who can cater for every skin tone and requirement.  Also ensure they have a wide range of skincare for each skin type.

How long does the make-up they apply last? - Pro products and the way they are applied last longer than your usual shop bought make-up.  Be prepared to re-touch at least the t-zone and lips, if anything.  (I supply a personalised face chart and product list on my make-up trials so touch up items can be purchased prior to the wedding day.  I often get feedback from my Brides that the make-up lasted well into the evening...and some the next day as they didn't want to remove it!)

Do they have their own studio? do they travel out to you on the wedding day? are they insured?  Do not book an artist who isn't.  Ask to see their Public, products and treatment liability certificate as proof.

Do they sell the products? If so, most artists are more passionate about the art of make-up than selling actual products.

Do they apply false lashes for you? (from my experience full strip false lashes look better and are less harmful than individual false eyelashes.)

These are just a few things to take into consideration.  Don't be afraid of asking questions.

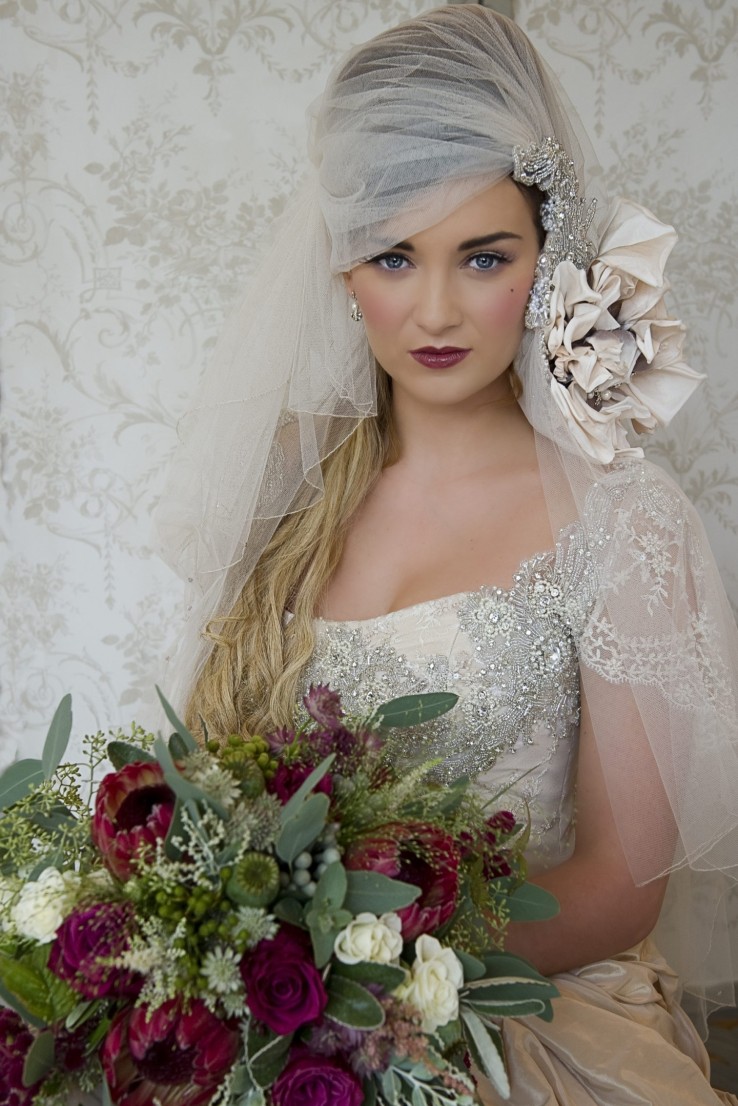
(Note - the image used was from a recent enquiry.)


Super noir winged eyeliner make-up.

Super noir winged liner look...

Here's the make-up I used for the Super noir winged liner look, (inspired by the Pixiwoos tutorial of the same name.)

Skin prep - Bobbi Brown moisturising balm SPF 25, extra repair eye balm then Sisley Double tenseur serum.

Foundation - (spritzed first with MAC fix +) Sisley Anti-aging foundation in Beige linen and Bobbi Brown foundation stick in Beige.

Concealer - Amazing cosmetics concealer in Light golden and Medium beige then lightly over the top YSL touche eclait.

Brows - Diego dalla palma brow gel No 23 and then Anastasia Beverly hills Dipbrow pomade in Ash brown.

Eyes - Bobbi Brown Sunny beige pressed powder over eye area.  Liner - NARS eye paint in Mesopotamia (in waterline too, top and bottom) Brush used - Maggie Hunt NO 7.  Mascara - Max Factor 2000 calorie.

Bronzer - Bobbi Brown in Medium.

Blush - Bobbi Brown pot rouge in Fresh Melon

Highlighter - Daniel Sandler Radiant sheen.

Lips - Rodial lip pencil in Nude and Lipcolour - Tom Ford in Blush Nude, then a touch of gloss - Bobbi Brown in Bare sparkle.

Jewellery by Daniella Draper.


Ethereal, dusty blue bridal.

Ethereal, dusty blue shoot.

As you may remember, I had the honour of working with Jess Petrie photography and Alison Jenner hairstylist recently.  Our shoot was featured on the prestigious Wedding Sparrow, (A wedding blog for the stylish fine art bride, Wedding Sparrow is an award winning inspirational website specialising in fine art weddings.) - www.weddingsparrow.com

Jess explained - "The main concept of this shoot was “less is more.” We wanted to replicate the bride being prepared for her Spring wedding at her boudoir. It’s a simplistic shoot that is enchanting, raw and emotive. At the start of the day/shoot the bride looks nervous and shy, but as time progresses you can see her confidence growing, she becomes playful and she is transformed into a beautiful bride, a shining star. Towards the end of the shoot she displays the magic and enchantment of a beautiful bride-to-be as she cries tears of joy as she visualizes seeing her love.

The buzzing sounds of glorious nature, the pink hues and the sweet smell of the magnolia flower, with the explosion of greys and blues in the sky, along with a creative team, all brought this romantic Spring bridal story together.

The bouquet was made from paper flowers and real branches, we wanted to focus on textures and colour palettes that complimented one-another, and that also helped to tell the story of a bride in Spring."

I loved being part of this shoot.  I played around with 3 make-up looks, ranging from very natural and pretty to a more dramatic, chic look.

For the look I have attached here I used the following -

MAC strobe cream, Bobbi Brown foundation stick.  Brows - Maybelline Brow drama.  Eyes - Tom Ford beauty Eye colour quad palette in Lilac dream.  Chanel mascara in Blue Night.  Liner - Bobbi Brown Cobalt Blue.  Cheeks - Bobbi Brown Pot rouge in Fresh Melon.  Highlighter - MAC strobe cream.  Lips - Bobbi Brown lip pencil in Pale Pink and MAC dazzle glass.  False lashes were from Chelsea Boutique in No 19.

.


A very high brow history - The Lincoln Journal.

Eyebrows - "A very high brow history."

Here is my column from the October Lincoln Journal.

If you follow me on Facebook, you may have seen my post about the "Insta-brow", a look which I am not a fan of.

I have so many requests from Mum's of teenagers, and other ladies, who want a bit of clarity and guidance on this very internet-led trend of over-doing eyebrows.

Experimentation and the resulting trends are all well and good, but I am sorry to say, fuzzy felt is never a good look - actually I am not sorry at all.

Eyebrows are made up of lots of little hairs, some of us have more than others, buts lets get back to brows looking like brows please?!

The 90's have a lot to answer for, namely the complete destruction of our eyebrows - you can thank Kate Moss and crew for that.  Fast forward a couple of decades and brows are now the ultimate facial accessory.

But trends are not a new thing.  Cleopatra was the pioneer of the bold brow, while medieval ladies turned attention to their domed foreheads by plucking brows.  In the Elizabethan era many women dyed their brows with a red tone as a nod to Queen Elizabeth I.

The 1920's saw the needle thin trend.  Clara Bow's brows were plucked away and pencilled in thin and straight, extending beyond the corner of the eyes.  The 1930's were influenced by Greta Garbo and Jean Harlow - brows had pronounced arches for added drama.

During the 1940's brows became thicker and softer, think Grace Kelly and Lauren Bacall.  In the 1950's Elizabeth Taylor, Marilyn Monroe and Audrey Hepburn all had lush, immaculately shaped brows.  Sophia Loren shaved off her eyebrows during the 60's and then pencilled them in using short, thin strokes to create a bold but natural look.

The 1970's marked the return of the natural brow - Ali McGraw and Lauren Hutton were the brow role models.

In the 1980's Brooke Shields and Madonna lead the way with busy, natural brows.

The 1990's had brows of all shapes and sizes! Drew Barrymore sported the over-plucked look, as did Pamela Anderson.  Kristen McMenamy's career skyrocketed after she shaved off her brows.

Today, the bold brow is back, thanks to Cara Delevingne, we are opting for the more feathery, natural look, (and no fuzzy felt in sight.)  With out high brow history now complete, here's my guide to rehab your brows back from the brink...

Use a thin pencil/brow gel to draw on fine strokes of hair, (it is very important to choose a natural shade, look at your hair colour in the nape of your neck and don't be too heavy handed with your product.)

If you are using a gel apply with a Louise Young LY31 brush, its the best.  Finish with a brow gel that contains fibres so it looks like you have some natural texture there.

Try using my recommended products and techniques to achieve a natural look - Bobbi Brown eyeshadow in Grey - very natural and suits most people as it has a brown undertone.  Apply this with an eyebrow brush, finish with a brow gel.

Anastasia Beverley Hills Dipbrow pomade - apply with a Louise Young LY31 brush in light, feathery strokes to create eyebrow hairs.  Finish with Volumizing eyebrow fixer by Diego Dalla Palma, (available from Marks and Spencer.)

If you prefer a pencil try a MAC/NARS brow pencil, or make sure when you buy it is quite soft and not too dark for you, always opt for the lighter option.  Black should never be an option, even if you have black hair, it looks too harsh.


Beautiful before and after make-up.

Problem skin and my secret weapons of choice...

Problem skin and secret weapons...

I have the pleasure of being able to meet and help so many people of all ages, each with varying skin dilemmas and concerns.

One of the most upsetting is acnified/blemished skin. I know first hand how this can affect one’s confidence. I suffered mildly as a teenager and now my 16 year old daughter is suffering with it too.

Being a Make-up artist helps greatly, as I can advise exactly what products can help with concealing and evening out the skin. However, often certain products can make the skin look worse and enhance the appearance. I must have spent hundreds of pounds on skincare and treatments over the years, not to mention time spent researching this condition.

In the end I opted to pay for a private consultation with a skincare specialist. A Professor no less. At least for now, we may be getting somewhere, we are a month into the treatment...

The condition is largely hormonal, however, you can help a bit by using the correct skincare and make-up. Diet is a myth, so we were told, (my daughter had great pleasure in hearing this!) We were also told not to use a moisturiser as blemishes/acne feeds from it...so that idea was quashed! if her skin did get dry, she was given a special facial wash to use and also a cream to use twice a week.

Make-up wise, I suggest determining first what your skin colour is and purchasing the correct formula and shade for your skin and type. Do not be pressured into buying anything until you have researched if it is non-comedogenic, (doesn’t block pores), and also obtain a sample first to ensure it is the correct texture and shade for you. Test it out before you buy it. If they don’t offer samples, do not buy anything!

Finding the correct products can be a real minefield. The products need to provide great coverage, longevity and not aggravate the skin.

Skin will need to be evened out with foundation then any redness or blemishes concealed with concealer. These two products are key and greatly helped my daughter through the worse flare- ups. Obviously if you have very bumpy or flaky skin, then applying make-up to this can make it appear worse, so you do have to bear that in mind.

Our two products of choice were the Bobbi Brown Long-wear foundation and also NARS creamy concealer. Both are non-comedogenic. The Long-wear foundation is great for my daughters skin as it is very oily and is a perfect match, as she is the palest shade in their range, she has very fair skin. The concealer also is amazing at concealing and staying put. Both products I highly recommend.

Other great products are -
Foundation - Lancome Teint Visionnaire, Clinique Anti-Blemish solutions liquid make-up and Cover FX pressed mineral foundation.
Concealer wise - this should provide extra coverage and is best applied over foundation - Cover FX cream concealer, Murad blemish treatment concealer and Bare Minerals SPF 20 correcting concealer.

If you feel you need to set your make-up I advise a light dusting of powder applied with a nice big powder brush. My daughter uses MAC Prime focus Prep and prime transparent finishing powder, but I also like Bobbi Brown loose powders. Go gently with powder if you have particularly dry skin.  Apply with a big fluffy brush - I love the Real Techniques brush or Maggie Hunt one.


Tina's makeup kit - Primers, etc.

Tina's selection of primers, etc.

Good make-up starts with the right base being used beforehand, e.g, there is no point putting makeup on bare skin if you have dry skin and are using an oil free foundation.  You need to be aware of what skin type you are, or how your skin is looking, feeling and behaving, the time of the year, the occasion you want the make-up for, then you can make the decision about how to treat it, what to use skincare wise and then use the correct foundation and other products to suit.

When packing up my kit for a wedding or a shoot, I have to have a selection of products in my kit that cater for all types of skin.  Ranging from sensitive, to dry to oily, or a combination.  I need products I can trust and I know I can use quickly and are reliable, and also work well with what make-up I am going to use on the top to compliment that model's/client's look.  I also need it to ensure longevity - as often, I am applying make-up for a special occasion or a shoot, so it needs to look its best, for as long as possible.

My absolute favourite has to be my trusty Bobbi Brown vitamin enriched face base - with this product I know it will perform, but if need be, I can also use other products, (e.g, if someone has particularly oily skin, I can use my Ben Nye final seal spray sprayed onto a Beauty Blender with the right foundation and then spray again when I have finished the make-up.  I can use the face base if someone has normal/dry skin and I can also use this product if the client has normal/oily skin.  It is a primer and moisturiser all-in-one so no need for two products, (plus it smells divine.) It is a good all-rounder and preps the skin ready for foundation/concealer, etc and ensures the skin doesn't look shiny, it also ensures longevity of the products, so I always stock up on this - I get through pots of pots!

If someone has very dry/mature skin - then I will opt for another Bobbi Brown product, (depending on the time of the year again and occasion.)  If it is winter and cold and the clients skin is very dry or mature, then I love to use the Moisturising balm SPF 25.  You only need a small amount - warm the product between your fingers and press onto the skin.  Voila - skin looks hydrated and has a lovely dewy, natural glow.  Other suitable products are then applied to compliment this.  This also is available in a tint form - I often use this on myself, particularly in the autumn/winter, it gives me a little bit of colour and is very moisturising.  However, if used all the time, it can block your pores, so ensure you exfoliate thoroughly and cleanse too.

BECCA resurfacing primer - This is a lovely product and one I know I can rely on if someone has fine lines and large pores.  It also ensures longevity of the products.  It has glycerin to hydrate and also absorbs oil to prevent any shine, so perfect for a matte look.  It is very light to use and does not clog pores, great for all skin types but particularly oily - so great if a hot day.

MAC oil control lotion - I often use this on teenagers, (my daughter loved this product.)  It is very lightweight but hydrating but delivers enough reliability to keep you shine free, if desired.  It is also non acnegenic, so I tend to use this on a younger skin, or someone who is prone to blemishes or who has very oily skin.

Max Factor Facefinity all day primer - I am not a fan of using a separate product e.g, a primer and then a moisturiser - a good base should consist of both things - to prime and to moisturise.  However, this is a good product to use under foundation to mattify and to hold the make-up on longer.  It contains micro correctors to keep any shine at bay.  It also contains an SPF 20.  I often use this if someone has normal/slightly oily skin.

This Works In transit skin defence - Great for sensitive skin, I often use this in the summer months.  It also has the benefit of having UVA/UVB broad spectrum sun protection.  It contains hyaluronic acid and calming vitamin E.  It is hydrating so good also for a drier skin.

Embryolisse lait creme concentre - A cult product - I know the Pixiwoo sisters often rave about this product.  It is enriched with essential fatty acids and vitamins.  It is a 3-in-1 lotion.  It nourishes any dry areas and is very light and quickly absorbed.  I like using this on dry/sensitive skins, but it is a good all-rounder too.  It has a velvety finish and "grips" the foundation to ensure longevity.  It can also be used as a cleanser, to remove make-up or even as a face mask!

Bobbi Brown hydrating eye cream - an essential in my kit to ensure the delicate under eye area keeps hydrated and is prepped before foundation and concealer.  Only a small amount is needed.

MAC strobe cream - A great product.  Very moisturising.  I particularly like to use this product if someone has dull skin as it gives it a boost and it luminises it with iridescent particles.  Great to give the skin a bit of radiance. I often mix this product with a foundation too, or even just to pat on the skin on the high points to give a highlight.  It is also non acnegenic.

Cover FX moisturiser - a great product if someone has redness as it reduces this and is hydrating, so great on people suffering with rosacea or high colour, also great for sensitive skins.

Urban decay pore perfector - I love to mix this with another moisturiser to ensure any fine lines or open pores are lessened.  It ensures a matte finish and is non-greasy, great for dry or oily skins.

I love using make-up fixer sprays - I have used in the past MAC prep and prime fix+ and also Make-up Forever mist and fix, but I love using Ben Nye final seal, I think it is far superior.  You can use this to make your make-up water resistant, (drag queens swear by this product so you know you are on to a winner!)  It locks in the make-up when sprayed on at the end, or you can use it to set your foundation sprayed on, or used with a Beauty blender.  By far the best make-up fixer.  Not the best smelling one admittedly, (it smells a bit of mouthwash), but it does work.  It can also sting a little too, (make sure your eyes are closed when spraying and don't get it into your eyes.)  Great for ladies who are perhaps going through the menopause and for use in the summer months.  I also like the Kiko make-up fixer, but tend to always revert back to my trusty Ben Nye.

Thank you for reading x


Wedding make-up on myself.

Wedding make-up.

I had the pleasure of attending my niece's wedding yesterday and on myself I decided to opt for a smoky eye look and nude lips.  I was wearing a Topshop green dress and so wanted something a little dramatic to compliment it.

I had prepped and had a bit of a tan with my beloved Sisley fake tan, I then covered any imperfections with my Nars tinted moisturiser and Bobbi Brown foundation stick, I don't tend to use powder as my skin is a little dry.

Under the eyes I used 2 Amazing cosmetics concealers, to hide my under eye shadows then I like to add a bit of my YSL touche eclait.

Brows - I used Anastasia Dip brow pomade and then added a Diego Dalla Palma tinted brow gel to add texture.

I then used a Bobbi Brown cream eyeshadow stick to act as a base, on the lid, above crease and under the eye in Sand dune.   I then used a Charlotte Tilbury eyeshadow quad, (the Sophisticate.)  Using the mid tone on the crease and outer lid, and a little underneath.  The deeper tones blended on the top and also along the top lash line.  I then added a BECCA gel liner along the top lash line.  Finishing with the neutral eyeshadow on the lid and under the brow.  I used a Max Factor 2000 calorie mascara, (top and bottom), then applied some Ardell Demi wispie false eyelashes, adding more mascara. I then used a Bobbi Brown long wear eye pencil in Mahogany and blended a bit into the lash line and tight lined too, blending again at the lash line.

I used a little bit of my Bobbi Brown bronzer in medium along the cheekbones and forehead.  I then added a Bobbi Brown blush in Apricot then highlighted with my Bobbi Brown pink glow highlighter along the top of the cheekbones.

Lips - I used Bobbi Brown lip pencil in Ballet pink then added my Tom Ford lip colour in Blush Nude, keeping the lips matte and finishing with a little bit of a deeper lip pencil by Bobbi Brown - called Bobbi.


Summer makeup look.

Summer make-up.

Phew it's been hot hasn't it! (not that I am complaining of course), we are just not used to it though are we!

A common Summer complaint from my clients are either their make-up vanishes completely or it ends up printing underneath their eyes or creasing in places.  Help is at hand...

I can't stress enough how important skin prep is, it is just as important as applying the right texture for your skin and time of year and how you apply your make-up.

If you have dry skin then try and use products that are hydrating but not too oily, otherwise in the heat, they will just slide off your face.  If you have oily skin then use oil free products, as you already have that oil on your skin you see.

Ok so skin prep - (depending on your skin type of course) - My skin is dry near enough all year round, so I tend to choose products to add moisture and hydrate my skin enough for it to feel comfortable but to not look too shiny or oily.  Always try and make time to skin prep correctly and then your make-up will look better and last longer.

At the moment my skincare routine consists of -

Bobbi Brown cleansing oil, then splashing my face with really cold water, I use the oil to remove my eye make-up too as it is very gentle and prevents scrubbing the delicate eye area or rubbing.  I do a double cleanse in the evening.  In the morning I do a very basic cleanse with Bioderma cleanser.  For evening I use Embryolissse lait creme concentre moisturiser as it is very light and hydrating, and doesn't clog the pores, I also use a Bobbi Brown eye repair balm.  For day wear moisturiser wise I use the Embryolisse but then make sure my foundation or tinted moisturiser has a SPF in.  I also always use my Bobbi Brown eye repair balm, its so rich and doesn't crease, it really works for me.

Twice a week (before bed), I will use Alpha H Liquid Gold, which is a powerful resurfacing treatment, enriched with lots of good stuff including Glycolic acid, which jump starts the exfoliation process...(I've also heard it can help Acne so I need to research this further, as my daughter is suffering from it at the moment.)

Before bed on the other nights I will apply a Sisley fake tan, (its the hydrating skincare one), which was recommended by one of the Make-up artists from Strictly come dancing, Lindsay Bown.  I have tried most of the fake tans and this one you literally don't need much at all, its very natural and doesn't clog your pores and doesn't have that biscuit smell that most fake tans do.

Ok so make-up - I opted for the fake tan as I was getting fed up of my make-up looking too shiny in the summer and I also wanted to wear less makeup on my skin, e.g, foundation and concealer.  The fake tan works a dream as it evens out my skin and its a bit quicker to look human for me every morning! So this would have been applied the night before, so is acting in place of my foundation.  However, saying that, I don't like to not have sun protection on during the day, so I opt for a Pure radiant tinted moisturiser by Nars, which is perfect as it is so light and natural, it has a SPF of 30.

Next, I do have a bit of scarring from blemishes and under eye darkness, so I will use 2 shades of concealer.  I have tried LOADS, so the only ones that work for me and the ones that don't crease are by Amazing cosmetics as they are water resistant.  I will apply the darkest shade on any uneven areas and then the lightest underneath my eye area, blend, and then apply the darkest on the top, blend and then reapply. Lastly I will apply a Touche eclait highlighter just along any dark areas and then blend again, only using a minimal amount.

Brows next - I use Anastasia Beverley hills dip brow pomade in Soft brown with a Louise Young LY31, drawing on little fine hairs to replace my stupidity when I was younger and wanted a Kate Moss Biba look!  I then use a Diego Dalla Palma tinted volumizing brow fixer in Medium to recreate the illusion of brow hairs.

I don't think that powder eyeshadows are good for summer, especially if you don't use an eye base beforehand, so I always opt for cream eyeshadows.  Again, I have tried lots.  I either opt for Bobbi Brown cream eyeshadow stick in Sand dune, (on the lid and blend away to brow, slightly under the eye), or NARS cream eyeshadow stick in Hollywoodland.  I then curl my lashes.

Eye definer wise - I use an E06 angled brush by Sigma with a BECCA gel liner in Belle Epoque, this is drawn on along my top lashes with a slight flick at the edges.

I then use a Max Factor 2000 calorie black mascara, only on my top lashes, wait for it to dry and then encourage them to curl up by pushing my fingers up against the underneath of the lashes, whilst they are drying, then reapply the mascara.

I then sometimes use a bronzer - I am loving the Cover FX one at the moment in Sunkissed, (along the forehead, under cheekbones, under my jowls! and along the nose and chin.)  Blush wise - as I have a tan my favourite is Apricot by Bobbi Brown.  I then use a NARS Super orgasm illuminator along the top of the cheekbones.

Lips - I love my Rodial lip pencil in Nude, then my favourite lip colour is Blush Nude by Tom Ford, I will then define my lips slightly with a Bobbi Brown lip pencil in Bobbi.  Sometimes I finish with a bit of lip gloss by Bobbi Brown, either Buff, Bellini or Bare sparkle.

So that's it! seems a lot, but actually, it only takes me about half an hour and i'm good to go, and look presentable for the day.  My make-up doesn't usually need re-touching at all throughout the day and doesn't crease at all.

Thanks for reading!xx


Burghley house, Stamford.

Burghley house wedding, Stamford.

I love travelling around the U.K, working on various weddings and yesterday I had the honour of visiting beautiful Stamford.  I had no idea what a great place it is to visit!

Burghley house, Stamford.

Burghley house, Stamford.

It was the gorgeous Rachael's wedding and she was getting married at the very majestic, Burghley house.  It is huge!  I had to do her wedding make-ups at The George in Stamford, which is a gorgeous old hotel, with lots of character, great food and amazing staff,

I took over the room slightly with my make-up kit, (as usual!), lighting was not too bad to work in and all went perfect on the wedding morning and we had such a giggle.

The George hotel, Stamford.

The George hotel, Stamford.

I had the Bride, Mum and 3 gorgeous Bridesmaids to make-up.  Rachael rocked a smokey, sparkly eye with nude, pink glossy lips and the Bridesmaids went for sparkly eyes and pinky glossy lips, apart from one of the Bridesmaids, who went for a slightly stronger look.

Rachael, make-up by Tina Brocklebank.

Rachael, make-up by Tina Brocklebank.

Rachael looked amazing in her fitted, lacey wedding gown. The Bridesmaids were in champagne floor length gowns.  The flowers were so beautiful, and as the Groom was Swiss, they incorporated Edelweiss into their flower scheme.

Beautiful Bride, Rachael.

Beautiful Bride, Rachael.

Rachael's make-up was kept natural but with definition on her eyes.  I used golds and bronzes, with a gorgeous gold sparkly eyeshadow from Make-up Forever.  Skin was dewy on the cheekbones and a flush of pink on the cheeks, lips were nude pink with shimmer lip gloss.

A wonderful, happy morning and I wish Rachael and her Husband lots of love, luck and happiness!

Booking

Lila Doe

+123 456789111

Aenean ut nisl nunc. Proin maximus, lectus a rhoncus eleifend, ipsum dui efficitur enim, vitae egestas diam felis non lacus. Nullam semper lectus massa.

Gina Copper

+123 456789222

Aenean ut nisl nunc. Proin maximus, lectus a rhoncus eleifend, ipsum dui efficitur enim, vitae egestas diam felis non lacus. Nullam semper lectus massa.

Address

178 S 1st St, Brooklyn 277
NY 11211

Phone Number